How to Shade With Colored Pencils: A Step-By-Step Guide for Realistic Blends
Learn how to shade with colored pencils step-by-step. Master blending, layering, and pressure control for smooth, realistic results.

Shading brings drawings to life. It also provides depth, mood, and space, which are not visible in flat colour. You do not need any complicated tools to shade well, but you do need some light control, smooth layers, and constant pressure. With a simple setup and clear steps, your blends can look soft and real. This guide walks you through everything, including how you will prepare your sketch, build layers, blend cleanly, and finish with confident values. Follow the process, work slowly, and your results will improve.
Why Is Shading Important When Using Colored Pencils?
Shading is important because it turns flat shapes into solid forms with value, contrast, and edges that describe light, depth, and believable space. Shading builds dimension by separating light from shadow and shaping planes. It increases contrast so colours read clearly at a glance. It also improves realism by anchoring objects in space and hinting at texture and weight.
How Shading Affects Light and Depth in Your Artwork
Shading shows how light hits and fades, turning outlines into forms with weight and presence. Soft gradations describe curved planes; firmer edges reveal corners and cast shadows that fix objects onto a surface.
The Role of Gradients and Colour Temperature in Realistic Blends
Gradients remove banding between tones and keep transitions clean. Warm lights feel close and lively, while cool shadows recede. Subtle temperature shifts create depth, clarity, and natural blends across skin, fabric, foliage, and sky.
What Tools Do You Need for Smooth Colored Pencil Shading?
The tools you need for smooth colored pencil shading are artist-grade wax or oil pencils, mid to heavyweight paper with a fine tooth, a kneaded eraser, a sharpener, blending tools, and an optional solvent for ultra-smooth transitions.
The Right Type of Colored Pencils
Use artist-grade sets for intense pigment and even layering. Wax cores blend softly and cover fast; oil cores hold sharp edges for detail. Keep a colourless blender and a neutral gray to unify values and control saturation.
Paper Texture (Tooth) and Its Impact on Shading
Choose heavier paper with a fine tooth so layers grip without snagging. Very smooth paper limits layers; very rough paper traps pigment unevenly. Always test on scrap to confirm gradient smoothness and value stability.
Essential Accessories for Shading
Carry a kneaded eraser for gentle lifting, a handheld sharpener for precise points, and blending stumps or tissue for light smoothing. Use a soft brush to clear crumbs without smearing or pressing pigment into the tooth.
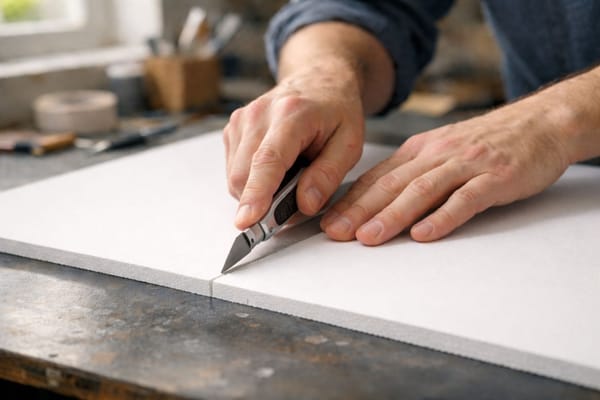
How to Prepare Your Drawing Before You Start Shading?
To prepare your drawing before you start shading, plan values and a single light source, test colours on scrap, and keep outlines light so they do not stain highlights or lock edges. Block simple shapes and assign light, midtone, and shadow families. Create a small value scale with your primary colours. Tape borders for a clean frame and set neutral lighting at your desk.
Build a tiny test study beside your drawing. Try different palettes, layer orders, and blender choices. Adjust pressure and stroke directions until transitions look smooth and repeatable every time.
- Reference: Choose one photo or object so shapes and values stay consistent.
- Value map: Mark light, midtone, core shadow, cast shadow, reflected light.
- Swatch test: Layer primary colours, then test a blender or a light solvent pass.
- Light source: Fix angle and height; keep it steady throughout the session.
- Clean surface: Brush crumbs away to avoid dents, smears, and muddy spots.
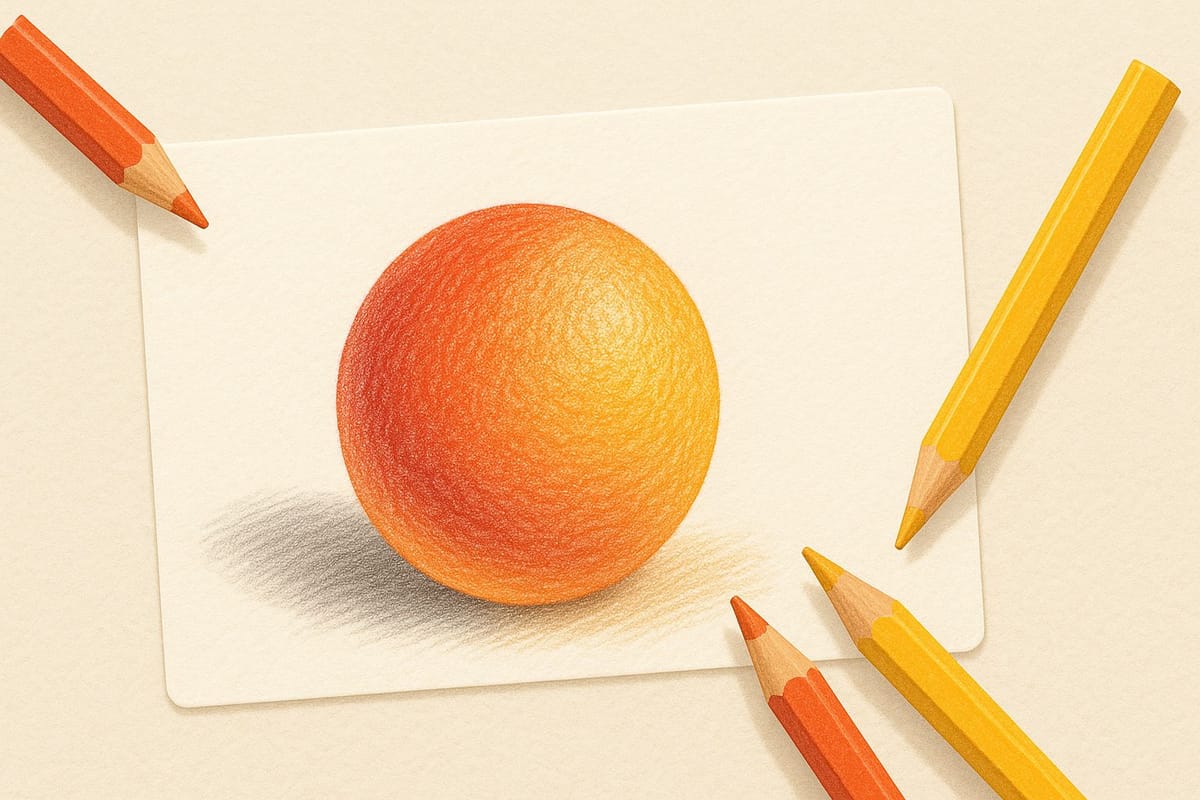
How to Shade With Colored Pencils for Realistic Blends: Step-By-Step Process
To shade with colored pencils for realistic blends, start with a thin base and a planned path from light to dark, then layer slowly, blend when ready, and refine edges and contrast last.
Step 1 – Start With a Light Base Layer
Lay a pale, even first layer using feather-light pressure and long strokes that follow the form. Keep the tooth open for later passes. Avoid heavy pressure that seals the surface too early.
Step 2 – Build Gradually Using Layering
Add thin layers in changing directions to fill the tooth evenly and hide patterns. Deepen values with neighbouring hues, not big jumps. Keep lights soft and sharpen edges near core shadows.
Step 3 – Define Shadows and Highlights
Cool or complement the shadow colours to prevent dull mud. Highlights have to be booked as clean paper or lifted with a kneaded eraser. Establish core shadows to anchor forms and clarify structure.
Step 4 – Blend for Smooth Transitions
Blend after several layers have settled. Selective smoothing: dot with a colourless blender or make light circular strokes with a stump. Avoid heavy pressure too soon to prevent wax bloom and streaks.
Step 5 – Refine and Add Final Touches
Sharpen points for crisp accents at focal areas. Soften background edges to increase depth. Review global contrast, adjust temperature shifts, lift specks, and sign when values feel balanced.
What Are Common Shading Techniques for Colored Pencils?
Common shading techniques for coloured pencils include layering for control, burnishing for polish, directional hatching for texture and form, and selective use of solvent or a blender for ultra-smooth areas without overworking the paper.
Layering Technique
Apply many light layers while shifting stroke direction to fill the tooth evenly. Introduce near hues to enrich colour and avoid lifeless shadows. Stop before the surface seals so you still have room to adjust and refine.
Burnishing Technique
Use firm pressure with a light pencil, white, or a colourless blender to compress layers into a slick, paint-like finish. Burnish near the end. Preserve detail by burnishing only where needed.
Cross-Hatching and Circular Shading
Cross-hatching stacks lines at varied angles to build value and texture. Circular shading uses tiny loops that hide edges and reduce banding. Combine both to suggest grain, fabric weave, or soft skin transitions.
Blending with Solvents or Blenders
Apply odourless mineral spirits sparingly to melt binder and level pigment. Let the paper dry before relayering. A colourless blender merges layers while maintaining hue and temperature stability across the gradient.
How to Control Pressure and Pencil Direction for Realistic Shading?
To control pressure and pencil direction for realistic shading, start light and increase gradually, and align your stroke flow with the form so coverage looks smooth and believable.
Begin with a whisper-light touch so the tooth remains open for later layers. Follow contours to describe volume clearly. Rotate stroke directions between passes for even coverage. Save strong pressure for final accents and selective burnish.
- Feather touch: Protect the tooth and allow for many clean layers later.
- Contour strokes: Match movement to curves, planes, and turning edges.
- Angle shifts: Change direction to hide patterns and fill tiny gaps.
- Pressure steps: Increase slowly; avoid sealing the surface too early.
- Final push: Reserve firm pressure for highlights, edges, and glossy spots.
Final Tips for Polished and Realistic Colored Pencil Shading
Slow down, plan your values, and finish with intent. Treat shading as design, not just darkening. Keep highlights clean, let midtones carry most of the form, and place shadows to anchor weight, never to drown detail.
- Work slowly and layer deliberately, don't rush your tones.
- Keep pencils sharp, but avoid scratching the paper texture.
- Step back often to judge values under neutral lighting.
- Store artwork flat to preserve your smooth blends.
Before you call it done, check four signals: clear value range, tidy edges, smooth transitions, and stable, warm, superb balance. If wax bloom appears on darks, let the drawing rest, wipe gently, and re-accent. When those signals align, stop; extra layers rarely help. Protect the surface, sign it, and take your refined process into the next drawing with a lighter first touch and a sharper plan.
Frequently Asked Questions
How Do I Choose Between Wax and Oil Pencils for a Project?
Wax pencils are best for creamy blends and quick coverage; oil pencils are best for crisp edges and fine detail.
What Paper Weight Works Best for Heavy Layering and Light Solvent Use?
200–300 gsm fine-tooth paper is the most reliable choice for heavy layering and light solvent work.
How Can I Avoid Streaky Gradients in Large Areas, Such as the Sky or Skin?
Streaky gradients improve with ultra-light circular strokes, a bridging hue between tones, and late blending after several layers.
Is a White Pencil the Best Way to Blend Highlights?
A white pencil lightens and slightly cools; a colourless blender unifies layers without shifting hue, keeping highlights clean.
When Should I Stop Layering and Move to Final Touches?
Layering is complete when values read clearly at arm's length, edges behave, and the paper tooth is nearly filled.