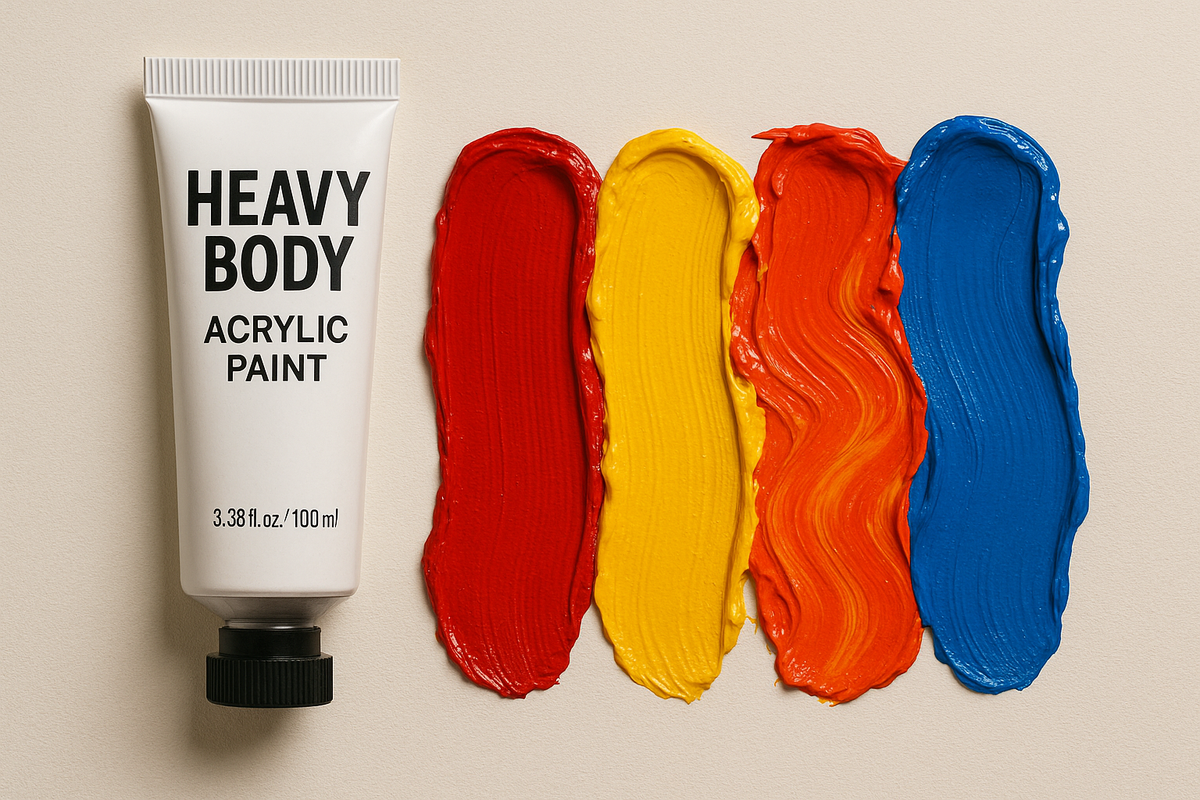
Heavy Body Acrylic Paints Guide: How to Choose, Mix, and Apply Like a Pro
Master heavy body acrylic painting - learn how to select, mix, and apply thick, vibrant colors like a professional artist.

Raised strokes catch light, guide the eye, and define form. Thick acrylics preserve those strokes and accept thin veils that tint relief without burying it. This guide explains how heavy body acrylic paint set supports precise edges, defined texture, and reliable colour across studio and plein-air work.
What Is a Heavy Body Acrylic Paint?
A heavy bodied acrylic paint is a high-viscosity colour that holds brush and knife marks with limited levelling and dries to durable films for impasto, scumbling, and broken colour. It keeps peaks readable under raking light and maintains assertive edges after curing.
Core Handling Traits
Knife planes stay crisp and directional. Bristle tracks remain visible. Thin veils tint relief without collapsing height. Surfaces read with depth at normal viewing distance.
Where It Excels
Alla prima passages gain structure. Abstract textures gain intensity. Focal accents gain sparkle as light skims raised strokes and small knife highlights.
Film Strength and Additives
The binder supports peak retention across layers. Gels add height without washing out colour. Retarders extend blending windows while stroke identity stays intact.
How Does Heavy Body Compare to Other Acrylic Bodies?
A heavy body acrylic paint set has a thicker consistency that retains strokes and texture, while softer paints spread evenly for smoother, flatter finishes. Here are the differences below:
- Heavy body holds peaks and brush marks for tactile surfaces.
- Soft body flows easily for glazing and detailed work.
- Heavy body suits, bold, textured techniques, and knife painting.
- Soft body suits, smooth blends, and layered transparency.
- Heavy body emphasizes structure and depth.
- Soft body delivers precision and clean, even coverage.
How to Choose Viscosity for Your Style?
Choosing the right viscosity depends on how your strokes, tools, and surfaces interact during painting. Thick, bodied acrylic paint is well-suited for knife work, sgraffito, and expressive textures that require strong edge definition. Softer consistencies work better for glazing, smooth blends, and fine details, while heavy viscosity remains ideal for bold accents and focal highlights.
Match Body to Tools and Surfaces
Firm synthetics or bristle brushes emphasize edge shape. Steel knives or silicone wedges set planes with authority. Smooth gesso favours crisp boundaries; toothier grounds raise drag for expressive scumbles.
Decide with Small Tests
Run short strips on your usual panel or canvas. A Heavy body acrylic paint set makes A/B trials simple, revealing drag, edge clarity, and levelling in minutes, so preference becomes evidence.
Balance Versatility and Focus
Maintain a single primary viscosity for most passages. Add a complementary body for tasks your main choice struggles to handle, such as ultra-flat fields or extreme texture.
Which Colour Range and Set Strategy Works Best?
A Heavy body acrylic paint set works best when it balances range and control. Start with essential hues, expand slowly, and maintain clean mixing across all tones.
- Begin with warm and cool primaries, a neutral, and two earth colours.
- Use single-pigment paints to keep colour mixtures bright and predictable.
- Add new colours only after a consistent need in multiple projects.
- Keep extra titanium white for mixing and highlights.
- Mix neutral grays from primaries to maintain visual balance.
- Build a small travel or studio kit suited to your painting scale.
How Do You Mix with Mediums and Manage Working Time?
You mix heavy body acrylic paint with gels, fluids, and retarders to control texture and blending time. Gels build height without weakening colour, while retarders slow drying for smoother transitions. A small amount of water improves spread, but mediums preserve binder strength and keep the paint film durable.
Roles of Gel, Fluid, and Retarder
Gels support impasto and preserve peaks. Fluids create thin, even veils for colour shifts. Retarders extend working time so blends stay controllable without dulling edges.
Clean-Color Habits
Favour single-pigment choices for clarity. Pre-mix value strings for repeating passages. Refresh small batches before skinning to avoid contamination.
How Do You Apply with Brushes, Knives, and Pass Structure?
You apply a heavy-bodied acrylic paint by building structure first, layering colour next, and refining accents last. Start with firm, opaque strokes to define form and direction. Then use thin veils to adjust tone and temperature without burying texture. Finally, add highlights and edge contrast to emphasize depth and focal clarity.
Brush and Knife Roles
Firm brushes shape coverage and edges. Knives set planes and focal ridges. Short placements protect chroma and reduce muddy interactions during revisions.
Viewing Distance and Light
Place accents for the final viewing distance. Check passages under display lighting to confirm value steps, edge sharpness, and sheen.
How Should You Prepare Surfaces and Grounds?
You should prepare the surface based on how you want heavy body acrylic paint to behave during application. Rigid panels provide firm support for knife pressure and structured strokes, while well-gessoed canvas captures movement with flexibility.
- Coarser gesso provides a strong grip for bold, textured strokes.
- Fine gesso suits smooth lines and detailed work.
- Smooth ground gives clean edges and subtle texture.
- Medium tooth balances glide and control.
- Coarse tooth enhances drag and expressive brushwork.
- Seal porous grounds before painting to prevent uneven absorption.
When Do Drying, Curing, and Finishing Matter Most?
Drying, curing, and finishing are crucial when controlling the final texture and colour stability of heavy body acrylic paint. Thin layers dry quickly, whereas thicker peaks take longer to solidify completely.
Timing Notes
Just because something is touch-dry doesn't mean it's fully cured. Gentle pressure beside a ridge reveals internal firmness. Patience at this stage enhances clarity and surface strength during finishing.
Finish and Sheen
Matte decreases glare and softens transitions. Satin balances depth with control. Gloss deepens colour and showcases relief. Match the sheen to the lighting, subject, and viewing distance.
Varnish Tests
Test finish on a corner or separate panel. Confirm that accents and glazes read the same under the chosen sheen before committing to the full surface.
What Are the Best Heavy Body Acrylic Paints on the Market?
Here are some of the best heavy body acrylic paints on the market:
Golden Heavy Body Acrylics
Dense colour and crisp peak retention define this line. Knife planes read clearly, and thin veils sit cleanly over textured passages across successive layers.
Liquitex Heavy Body Acrylic
Balanced viscosity supports structure and blending. A comprehensive medium ecosystem makes it practical to move between thick passages and thin optical layers in one session.
Winsor & Newton Professional Acrylic
Fast surface set helps clean edges and confident layering. Refined hues suit representational work and contemporary abstraction that requires dependable handling.
M. Graham Heavy Body Acrylic
A buttery feel and strong chroma work well on smooth panels. Open handling supports on-surface blends while forms remain stable through drying.
Amsterdam Expert Acrylic
Reliable viscosity and a modern palette suit daily studio practice. Coverage and tinting strength stay steady across common techniques and supports.
How Should You Navigate the Category?
- Filter by body, canvas size, and preferred tools
- Shortlist by maximum height, base stability, and technique
- Pair paints with gels or fluids that match your pass structure
How Do Studio Workflows Leverage Heavy Body?
Studio workflows utilize heavy body acrylic paint, employing texture and light to guide composition. Bold, raised strokes define structure and volume, while thin colour layers enhance depth without hiding relief. Small knife accents reintroduce brightness at focal points, keeping the surface dynamic and visually balanced.
- Build a form with opaque placements that state volume
- Shift temperature with transparent veils that respect relief
- Finish with selective highlights and controlled edge contrast
Mapping Structure with Confidence
Block major forms early and state direction with clear planes. Keep edges intentional so later veils have a dependable foundation for colour development.
Accents and Edge Control
Place highlights where planes turn into light. Reinforce volume with tight edges near focal areas and quieter edges in secondary zones.
Final Take
Keep the process simple. Choose viscosity by mark and ground. Mix with mediums that protect binder strength. Apply in structured passes that state form, develop colour, and finish with emphasis. A heavy body acrylic paint keeps texture readable, edges confident, and colour clear. A Heavy body acrylic paint set supports testing, speed, and consistency from first studies to finished pieces.
Frequently Asked Questions
What Makes Heavy-Bodied Acrylic Paint Good for Impasto?
High viscosity holds peaks and tool paths, so raised strokes stay visible after drying.
How Do Gels Change Texture and Height?
Gels thicken paint without weakening colour, so peaks gain stability and remain crisp.
Which Surface Works Best for Knife Work?
Rigid panels provide firm resistance to pressure, while tight gessoed canvas records gesture with less bounce.
How Do I Avoid Muddy Colour Mixes?
Mix briefly, place cleaner notes, and then use thin glazes to adjust the hue instead of over-stirring.
When Should I Apply Varnish Over Thick Layers?
After the ridges feel firm under gentle pressure, apply an isolation coat, then choose a sheen that suits your lighting.